Last week while I was in CA for work, Ryan worked on my Mother’s Day surprise – our bedroom and most specifically our closet! The hard part, sanding, priming and sanding trim was all done when I got home Friday! We spent the weekend trading off painting time and kid playing time – getting the closet completely done (trim and walls) as well as the trim paint started in the bedroom.
Details – first Ryan finished up the trim in the closet ceiling (boxing out the light). Then all the holes that had been filled had to be sanded. All the trim was primed (his dad helped!) and then everything was sanded again.
I caulked the bedroom trim (Ryan had done the closet already as that was his main goal to finish) and we got the doors almost completely painted too (1 coat left on 1 side). The bedroom is so close!
Last night we started hanging the closet system that we bought Saturday. I picked up the last pieces we need today so tonight we can put in the shelves!! Paper will come off the floor (in there) and we can hang the closet door even!
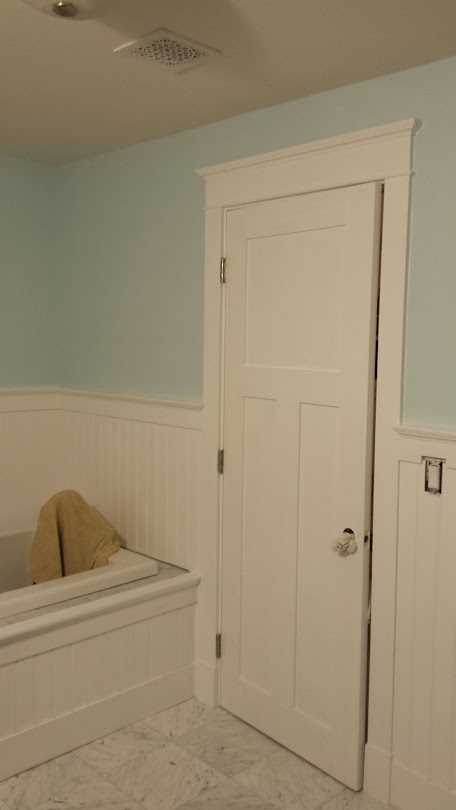
Closet painting finished … i really should pick out a light for in here!The breaker box could use some cleaning off 🙂Doors painted! That glass one is for the closet!A view of the trim/built-ins.
Oh and Brad came over and installed our toilet and vanity! I just have to put in the toilet seat and we have to put in the backsplash and those will be done. The mirror is ready to hang and I put in the light the weekend before. Some shoe molding and electrical and the bathroom will be done.
Toilet and vanity installed!Vanity Light – and a view with the tile floor mat in front of the vanity
We’ll be moved in this weekend hopefully! Just have to keep up the painting momentum – even through child illnesses the progress has continued.
It’s our annual April vacation where the kids go to daycare and we stay home and work on the house – coincides with our birthdays. This year the focus was on the master suite (just a few more weeks and we’ll have our own room!).
Monday was Alex’s birthday so we did a family fun day but we worked Sunday (Saturday was alex’s bday party), Tues-Friday. Sunday, Monday, Tuesday and Wednesday the focus was on finishing the trim in the Master and painting the master bathroom. Ryan got the built-ins finished and all the trim installed by Wed night night. I painted Tuesday and Wednesday (2 coats on the trim and 1 coat on the walls). So the master bathroom just needs one more coat on the walls.
Same blue as the small bathroom
The master bathroom trim is white (Ben Moore Chantilly Lace to be exact) – the rest of the house is Linen White (more off white) but we thought with the tile the bright white looked better.
Left built-in finished!
Technically the built-ins need shelves still but the grooves for putting the brackets in are there so it’s just a matter of making the shelves and installing the brackets.
Closet is trimmed out as well – the light box has to be trimmed out but that’s it.Doors and chair rail all done – even the little closet is trimmed out
Thursday was flooring day! First we sanded – that took all afternoon, then after a dinner out I went back and did the first coat of poly
First round of sanding1st coat done!
These are the same as the other bedroom – cherry – but a bit more variety in color I feel like. It’s beautiful! Today is our last actual vacation day, we got the sanding done and Ryan is doing the 2nd coat of poly. Saturday I’ll come over and do the third and by Sunday night we’ll be back in the house (we are staying at my parents while the poly dries) – the fumes generally bother me but it is pretty contained to the bedroom only and the weather is PERFECT for drying the floors quickly and leaving the windows open over night.
We’ve got 3 weeks before we can put a rug in so we have the time to get the trim and walls all painted. Going to be a busy few weeks as we can’t wait to get in there!
We have a couple of things working against us on the house progress front right now, some planned some not planned. First we have busy Saturdays entirely for 4 weekends in a row. Second Ryan got sick, his work got busy then Bella got sick this past weekend and his work is still busy. Travel and illness and work.
2 weekends ago Ryan managed even though he was sick to get a start on the built-ins in the master – just got the base platforms in. The built-ins will be just open bookshelves. We originally were going to do cabinets however the room is a bit tight when you count 2 night stands and a king size bed, the cabinet doors wouldn’t open so we’re going with just open shelves (same amount of storage space).
The base for the left oneAnd the right
They have to be pretty high off the ground so the trim will look correct going across the front (baseboard). I’m excited for the extra storage for sure.
In stitching news I’ve had a lot of time in the evenings to stitch (sure I could be painting or something but it’s more fun to stitch) 🙂 I pulled this piece out that I started years ago – it’s called Autumn in my Garden by Mirabilia (there’s one for each season) and I’m stitching it on 40ct fabric over 2 to make it a bit smaller (these pieces are quite large). I finished up the lady’s skirt and started the pumpkins. It’s beaded a little bit and I think it will be a very pretty piece when done.
Autumn in My Garden progress
I was only going to show stitching when it was a finished piece but if I’m working on such a large piece I like to track the progress a bit more. I have another small piece in progress that I’m doing as my travel piece that I’ll show when that’s done. Continuing to work through my old previously started pieces. Soon I’ll have to start something new though at this rate!
Ryan spent the weekend working on trim in the upstairs hallway and master bedroom. The door trim and baseboards are well under way now!
Doors still need caps but are looking great
That little closet has a door frame now so we can put on a door some day 🙂In the closet the baseboards are doneI think I’ll be the one putting trim on inside this closet!
The next few weekends are all booked with activities – but hopefully we’ll get some Sunday time to continue work on the trim – we’ll see!
More progress on the master bedroom this last weekend! First up – fun thing – since I finished installing all the outlets in the master bedroom and hallway last week I was able to install the LED strip lighting in the linen closet :
Lighting!
It takes a power supply, switch and this strip of LED lights that are adhesive (tape) that I ran all along the inside trim of the closet (all the way around the top) so we get great light in there! I had planned for this so the outlet was installed in the closet up high for just this. There’s an outlet near the floor for roomba too.
More importantly though was Ryan’s progress. Saturday his Dad and he finished up the floor in the bedroom!!!
Floor finished!
The little spot at the end there is where the built-in bookcase will go (so plywood base) – there is one on each side of the closet. Speaking of closet, then they got the closet door installed!
LOVE this door!
On Sunday Ryan got the threshold to the master finished and installed the bedroom door!
Door done!Threshold
The plan for this weekend is to get those built-ins done and a good start on trim. The windows are done so it’s door trim, baseboards and chair rail like in the girls’ rooms.
I’m hoping by the first weekend of April the trim is done and we are sanding/polying the floors in there! Then it will be painting and we can move in by the end of April? I’m trying to be conservative because things always come up. We have a vacation planned in April but if the weather is nice I think Ryan wants to work on the front porch we are adding so that we can get the new roof installed in May. SO many projects to do!
This past weekend was a busy one! Thursday night Ryan finished installing the trim in front of the tub and I got all the trim caulked and holes filled.
Friday Brad sanded and primed all the trim.
A view of the tub trim finished too! Most of that is removable in case we ever need to get under the tub to the pump.Where toilet and vanity will goDoor
Friday night Ryan and I finished the master closet ceiling bead board installation and moved tools downstairs. The ceiling isn’t finished but we wanted to get the bead board finished so it could be moved downstairs.
Ceiling of closet
Saturday after a trim to home depot for supplies and more cleanup, Ryan and his dad started putting down the new floor in the master bedroom! It’s hard to work in a room where you’re laying the floor, each time they cut and router they have to vacuum etc but we have no other place to do that part of the work!
By the end of Sunday they had the master closet and about 2/3 of the main room floor finished! We have to clean it all up and move the pile of wood so this weekend Ryan can finish it up. Once the floor is done it’s on to door installation and trim!
Floor!This side of the room is doneThis pile of wood has to be moved so it can be finished 🙂
While the guys did the floor on Sunday at naptime I got the door knobs installed on the newly painted doors and filled up my new linen closet (Ryan cut the shelves Sat night for me)! Finally a closet with a door (this may be my first ever finished closet that has a door on it already!).
Not many linens but it’s my first closet for bathroom supplies. And finally towels are out of the hallway!
I’ve really fallen behind on blogging! And it’s too bad since we took a staycation from work off in November to work on the house (tiling) so I should have updated then – it was a long week though.
So this post will just be a catch up of progress since the last one – based on pictures I have 🙂
The master bathroom was our main project if I go in order – we finished spackling and sanding, then installed water proofing for the shower and floors (Kerdi system)
Sanding doneShower system installedBathroom door installedBathroom ceiling painted (don’t want to paint after tile – ceiling painting can involve drips!)Getting shower tiles ready to go – Schluter Ditra on the floors
Tiling the bathroom was a long process – mostly because we were using big tile and that meant that most of the tiles had at least 1 cut. It basically went – 1 shower wall done 1 day, 2nd shower wall done 2nd day. Break on the 3rd day (other projects). Shower floor 4th day. 1/2 floor day 5 and finish day 6 (saturday after our vacation). The days were short because we had drop off/pickup at daycare and we were cutting outside until saturday so once it was dark we couldn’t see. We brought the saw inside Saturday and stayed up late to finish.
After day 2 – showerShower floor went pretty quick since we dry laid it first (and cut)Shower finishedFloor in progress!Floor finished!
These pictures I took today but they cover the projects since our vacation.
Tile with the spacers removed (not grouted yet)
So we haven’t grouted yet – 1 month later! The reason for this is that the tile turned pretty grey after being installed. (it started white). We had to wait for the thinset to dry out so the tile would turn white again (white thinset) – the floor is white now, the shower is still a light greyish tinge but I think we’re going to call it good now. I love it – it bothers ryan more (the color not being bright white) – but 12x24s take a long time to dry. So now we have to clean out grout lines, seal the tile, grout, then seal the grout. So plenty left to do!
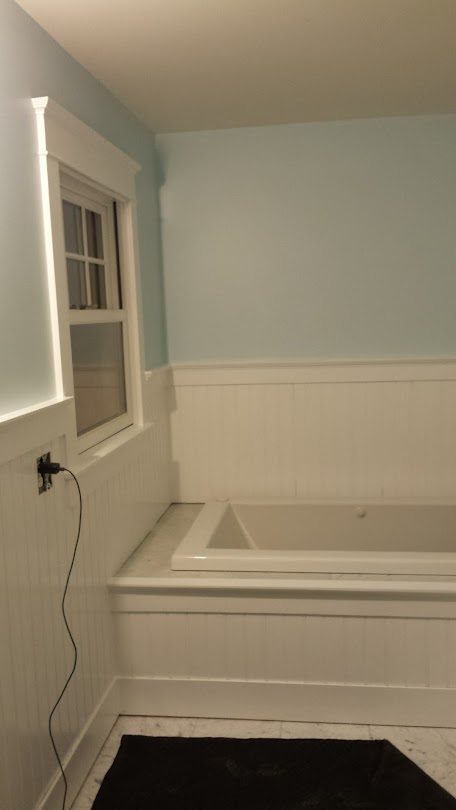
Bathtub view. The wainscotting is going to go across the front of the tub surround (to tie in with the walls)
Other projects included more sheetrocking …
Master bedroom is sheetrocked (i think 1 sheet is waiting to get installed) – so just about ready for tapingSheetrocking the playroom downstairs – also there’s new plywood on the floor that you can’t see due to the rug 🙂
Obviously we couldn’t wait to start using the playroom! I finally have space in my livingroom – this was a must in order to put our tree up this year!
Organization in progress….
And then we did the tree!
It’s starting to feel like Christmas around here
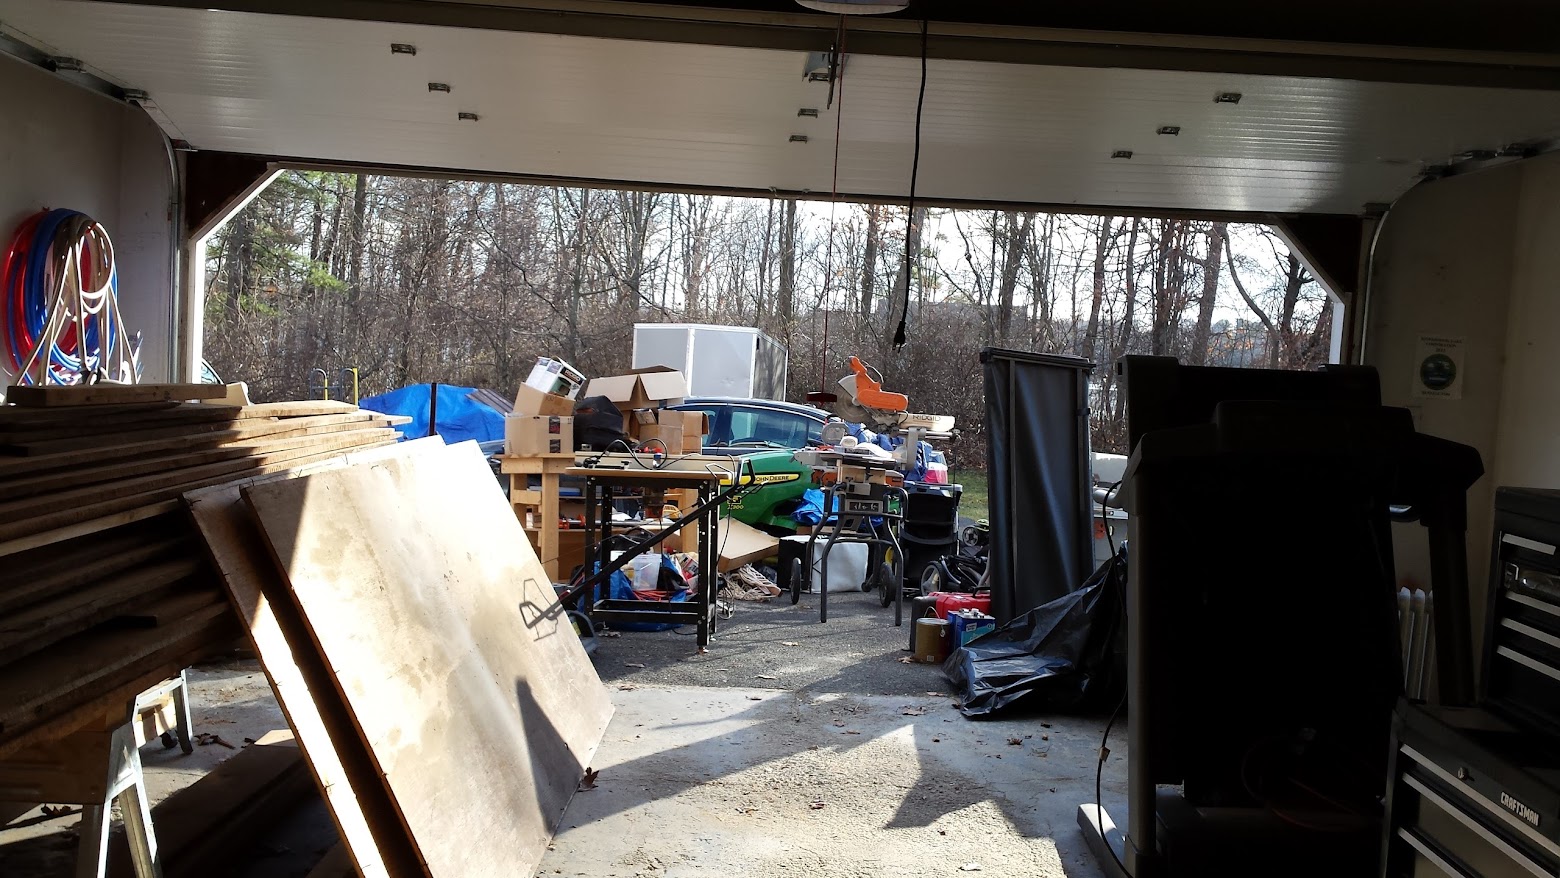
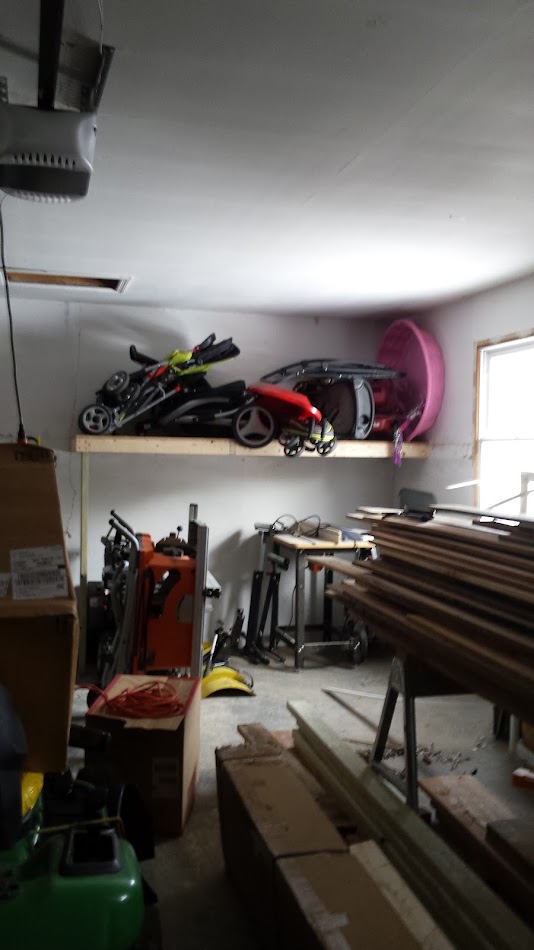
This past weekend we started another new project – Garage organization. We have some new cherry wood coming that we need to store in our garage – but our garage was full!
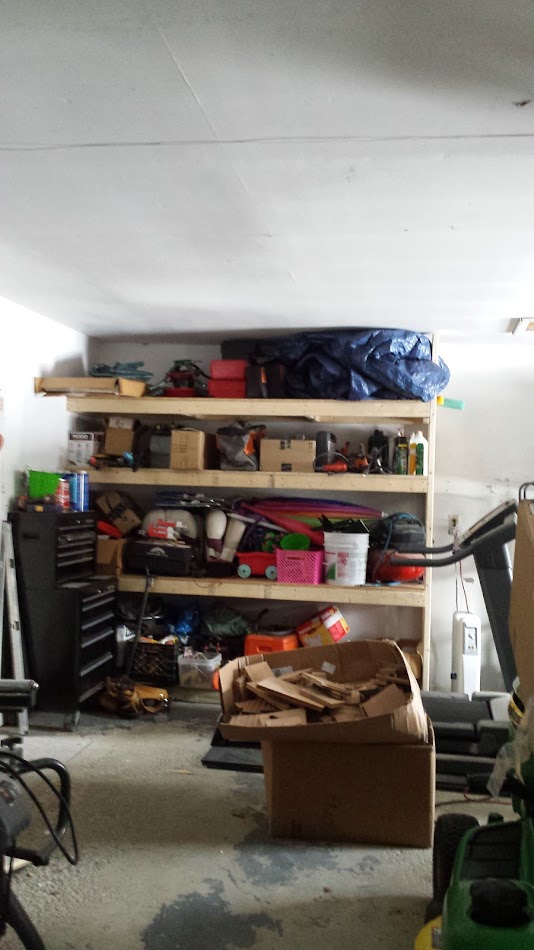
Step 1 – empty the garage outStep 2 – take out the old shelf that was very inefficientRyan built new shelves!
We can fit more on narrower shelves than we could on that one big/deep one!
And one shelf for strollers… clearly I need to get rid of some strollers
We finally did some yard cleanup in preparation for snow so this time we were prepared for the snow that came!
The main thing not really shown was the new plywood on the playroom and office floors – nice and sturdy! The master bedroom will get new plywood next and we’ll start taping/spackling soon. We’re having flooring for the master made now too (more cherry).
That’s a long post, i’m sure more has been done i’ve missed but right now we are in holiday mode – getting ready for our first christmas here! The girls are excited – cookie baking this weekend and next week!
Hopefully the pictures all load, I’ve heard they don’t always load – I’m going to try to figure out a new way to show photos if these don’t work well but initial research was not promising.
I think I’m 2 weeks behind – so let me catch up. The weekend before last Ryan and his dad sheetrocked the master bedroom (yay!) – i think we have 1 piece left that is waiting on me re-wiring the switch because they cut out the sheetrock that had the switch installed (it had an old work box, needs to be changed to a new work box).
In the meantime I was spackling the bathroom most evenings and finished that last Thursday – plus our tile arrived for the bathroom on Thursday too. So we were thinking – ready for tile prep this weekend but alas Ryan was concerned about the engineering loads to hold the marble tile without it at some point cracking or popping. He did some calculations and realized we had a few issues – a) our floor joists weren’t even 2x10s – they are like 8 1/2″ wide not 9 1/2. Then the subfloor plywood is not structural flooring plywood. Finally the hardi backer we had down which is not structural is also not recommended for Kerdi because they don’t bond well. Plus there’s major sag in the floor towards the middle – and leveling would just add more weight. The hardi backer we put down and it was glued so taking it up was no easy thing.
The plan :
Take up all the flooring (hardi and plywood) in the bathroom.
Jack up the floor from underneath to reduce a bit of the sag
Add 2x6s on the flat to the bottom of each joist – making a T beam essentially – they are glued and screwed – we lose 1.5″ of ceiling height downstairs in that room but gain a LOT of strength to the floor
Laminate each side of the floor joists with plywood (we do this a lot to add strength – works great)
Put down 3/4 structural plywood then a layer of 1/2 that we will then use the Kerdi system on – including the underlayment on the floor
This was quite a project and due to the rough in plumbing being done – we had to pull that out and the water lines will have to be re-run. Luckily the drain lines were fine – except for taking out the toilet flange – they were mostly waiting to be installed anyhow. So a little re-plumbing has to be done – but we have a much more structurally sound bathroom floor and our tiles should not crack.
So far we got steps 1-4 done above – plywood isn’t down yet because we have to take down the jacks (so waiting for glue to fully cure) – then they’ll shim the plywood as they install it to get it more level. I assume this will happen a bit next weekend.
In good news the sheetrock held up surprisingly well and we hadn’t sanded yet at least! So there’s a crack over the door – which is very expected since that’s center of the room – which will be repaired once the new floor is in. Then we just have to patch that one crack, sand/prime/paint the rest. Then we can move on to tiling!
We also got the boat out of the water for the season and cleaned off really well – I think the weather is warm and sunny tomorrow so once the rug dries we’ll finish winterizing it and cover the boat then move it to store it over by the driveway (it’s by the hose right now) 🙂
Finally some pictures of what our office ceiling looks like now – and you can see through the floor joists to the bathroom – nothing like going backward in a renovation to move forward in a better direction!
2x6s along the bottom of each joist and it’s still jacked upYou can see the bathroom upstairs – spackling done – and the plywood laminated on the sides
We will continue this across the rest of the office – to support our bedroom floor which we’re not actually worried about but for consistency. We are going to pull up the 1/2 inch particle board in the master bedroom and replace with 1/2 or 3/4 plywood as a better subfloor for our hardwood.
We also purchased another 750 board feet of Cherry lumber – milled 40 years ago – going to have it turned into flooring for our bedroom and the playroom! That should be getting delivered this weekend and we’ll take it next week to the mill for planing. We need to get more still – for the rest of the downstairs but when you get a deal on good Cherry and we’re going with Cherry throughout – we had to jump at it!
Progress continues quickly as we finished up all the prep work for insulation and they came out last Wednesday to start the job (they are finishing up today with a few small touch ups and cleanup). We are seeing a huge improvement in heat retention even with the heat turned off this weekend (we turned it off so we don’t get any of the insulation spray fumes in the air handlers/filters). We used the fireplace this weekend and today it was still 50+ degrees on both floors! Once we start running the heat again it will barely have to run!
A few pictures I took last week…
My sewing room
All 2×4 walls have 1.5″ of closed cell, then open cell to fill. The 2×6 (new) walls in dormers are just open cell. The attic and basement rim joist were also all sprayed. The only part of our house without spray foam is now the addition section (over the slab) which is the livingroom, washer/dryer room and the un-insulated garage.
Downstairs bathFront entryPlayroomKitchen
Ryan and his dad worked on the house this weekend. They got the ceiling between the old ceiling and new dormer section firred out, ready for sheet rock :
Ready for sheetrock
They also got all the rest of the frieze board/trim installed on the dormers as well as the front of the soffit corners covered with white aluminum!
Dormers ready for siding
The hope was to do siding last weekend but the siding that arrived was the wrong kind so we are now waiting 2 weeks for a special order siding. In the mean time we are getting ready for drywall upstairs – our plumber has started running the lines for the bathrooms and Ryan is finishing up the last bit of framing. I have a tiny bit of electrical (hooking some lines up to the panel box) and we should be ready to go. I think if we were doing the drywall ourselves we’d just be going on it already – our hold up is that we hoped to hire someone because the taping/spackling would go so much faster if it wasn’t us doing it. We’re not hearing back from the one person we found that could do it so we may just have to do it ourselves and hope we can do it quickly enough.
I’ve been very neglectful in updates because I didn’t have pictures and I haven’t been there for 99% of the work that’s been done… partly because Ryan’s dad has done so much for us! One afternoon he went over and demo’d all the exterior walls because we had decided we’d do that and spray foam… next day they were done and in the dumpster already… amazing!
Another afternoon it was the bathroom floors (with all the tile) – all removed and cleaned up!
Ryan and his dad have been hard at work getting all the framing done – including adding firring in a lot of the new closets to allow for more spray foam/higher R value and to cover the joists to get barrier. We’re going to go with an inch of closed cell then filled with open I believe in a lot of the areas. It will be a big investment but worth it in the long run.
Wiring/electrical continues when I have time. I’ve got the last bedroom ceiling fan/light installed and working along with a light in the small attic space and one closet done. There’s a lot to do left – just in Alex’s room alone I have to do light in the dormer, light in the other closet, smoke detector, outlets (add new and run a new feed in general), cable run. Pretty much repeat that for the other rooms and the bathroom I haven’t even started. Plus i need to do a subpanel still.. currently we’re just running lights off the old feeds that fed the whole upstairs (it was a 3 wire). I have no outlets upstairs currently wired.
Framing, demo, electrical – the upstairs is coming along. We’ve got a tiny bit of framing left, electrical to do, then it will be spray foam and sheet rock. We’ve done planning – got the master bathroom layout decided and I convinced Ryan on built-ins anyplace I can fit them 🙂 Ryan’s dad actually came up with a great idea for built-ins/desk in Bella’s room – we exposed extra space at the back of the room that we’re going to put some cabinets and shelving in for her. Here are some pics…
The framing for the master bedroom dormer wall – the two sides will be built-in cabinets with some shelves on top and the closet itself is ready to go once it gets a light!Our new master bathroom wall – that’s a small closet to the right, we will have a tub on the right hand side when you walk in, the vanity will be straight across from the door and the shower and toilet will be to the left – where they were originallyBella’s room… that little nook will have 2 cabinets with space between to form a desk (with a top of course) – then some corner shelves in the corner you can’t see – behind the closet. Storage storage storage! That’s the space above the livingroom past her room – we hope to cathedral the livingroom ceiling some day and use that space!Alex’s room – Dormer is open, closets on the sides of the dormer will have doors.Another view of the left side – that door way to the left is the entrance to the small ‘attic’ storage space we will have unfinished – it was original to the house like that so we are maintaining it and going to use that space for storing decorations etc.
It’s exciting to see so much progress. Now I just need time to work on electrical.